
WayNotes is a minimalist note-taking app that aims to present a more icon-driven interface in its operations. While we try to keep things as simple and straight-forward as possible, there are a lot of tools and features, and documentation is always good to have on-hand. Please let us know if there are any discrepancies or missing information below.
Table of Contents:
- The Library View (Main Menu) (updated)
- The App Settings Menu (updated)
- The Help/About Menu
- Book Entries (updated)
- Creating New Books
- The Book View
- General Navigation (updated)
- The Drawing Toolbar
- The Shapes Menu
- The Group and Transform Menu
- The Tool Options Menu (updated)
- The Color Picker (updated)
- The Top Menu Bar
- The Bookmarks Menu and Navigation (updated)
- The Zoom Menu
- The Book Options Menu
- The Note Editor (updated)
- Drawing in the Note Editor (updated)
- Note Editor Home Toolbar (new)
- Note Editor Format Toolbar (new)
- Note Editor Colors Toolbar (new)
- Note Editor Options Toolbar (new)
- The Context Menu (new)
- The Object Settings Menu (new)
- Upcoming features…
- Thank You

The Library View is the Main menu for WayNotes, and is where you start your note-taking journey every time you start your app. At first run, WayNotes will automatically create a Tutorial notebook for you, as well.
At the top is the Dashboard, which tells you how many notebooks you have, as well as allowing you to sort the Book Entries present:

- Sorting the books by Creation Date, Last Edit Date, or Name
- Sorting the books in ascending or descending order
In addition, there is a toolbar at the top-right which holds two menus: The App Settings Menu, and the Help/About Menu.


The App Settings Menu sets defaults for all new notebooks created. You can change these settings individually in the Book Options Menu, later on. The default settings you can set here are:

- Book Stripe Color: Change the default color of the stripe/tab of all newly created Book Entries.
- Book Background Color: Change the default color of the background area of all newly created Book Entries.
- Book Border Color: Change the default border color for all newly created Book Entries.

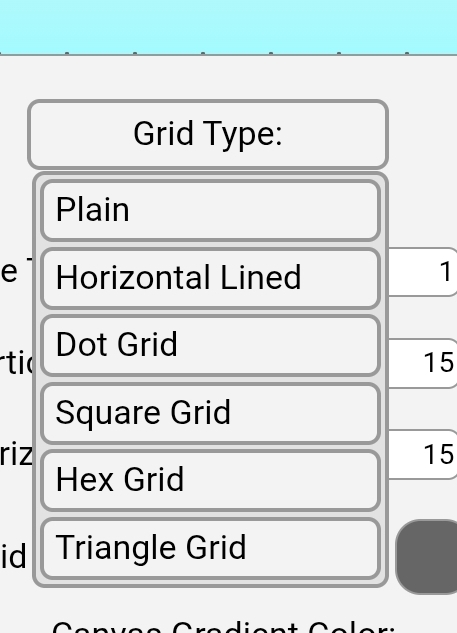
- Canvas Default Grid Types: Set a default grid type for notebooks to any of:
- Plain (no grid)
- Horizontal Lined (like a traditional notebook)
- Dot Grid
- Square Grid
- Hexagonal Grid (new)
- Triangle Grid (new)
- Canvas Grid Color: Set a default color for the above grid, if it is not set to Plain. Tip: Use with some level of transparency for better effect.
- Top Color (new): Sets the top color of the background gradient. Set both colors the same to set a solid color. At present, the gradient runs vertically.
- Bottom Color (new): Sets the bottom color of the background gradient. Set both colors the same to set a solid color. Set both colors the same to set a solid color. At present, the gradient runs vertically.
- Line Thickness (new): Set the default line width for the grid. Generally, thinner is better, but you do you.
- Vertical Spacing (new): Sets the vertical spacing/height of the grid.
- Horizontal Spacing (new): Sets the horizontal spacing/width of the grid.

- App Theme: You can set a light or dark theme for the app.

- Select Shape After Created (new): Checking this will automatically set the newly created/drawn shape or note to be selected.
- Deselect Object when closing Context Menu (new): Checking this will cause the object you’re working with to automatically deselect when you click Close on the Context Menu.
- Animate panning to bookmarks (new): Checking this will cause the Book View to quickly pan to your bookmarks instead of immediately jumping to them.
- Zoom step for zoom in/out buttons (new): This controls how much the Book View will zoom in/out when tapping the zoom in/out buttons. This is independent of the pinch zoom, which depends on your gestures.

The Help/About Menu is where you can find, primarily, a link to this website, where you can find this documentation. You can also find a link to our support email, and copyright, trademark, and information on icons used in the app, as well as any other important information.
Book Entries:

Book Entries present you with all of your available Books, along with a quick look at important information, such as:
- Title of the book: This can be changed in the Book’s Book Options Menu.
- Description: This can be changed in the Book’s Book Options Menu.
- Creation Date: Date the notebook was created.
- Last Edit Date: Date the notebook was last edited/changed.
- Book Options (new): Provides access to the Book Options Menu.
- Delete Button: Allows you to delete the Book permanently. This cannot be undone!
When you are ready, you can click on any of the Book Entries to open its Book View…
Creating New Books:

At the bottom of the Library View is the Create New Book Button. Clicking this button will pop up a default dialog prompting you to name your new Book. Once named, its Book Entry will be added to the list of Book Entries above it. The list is scrollable if you create enough books.
The Book View:

Once you’ve opened a Book, you’ll find yourself in the Book View, or Canvas. The Book View is an infinite canvas that allows you to place notes and drawings. The drawing tools are vector-based, and so you can edit them and move/resize/rotate them. On the left (or bottom, in portrait layout on a phone), you will have your Drawing Toolbar, and at the top of the screen you can see the Top Menu Bar, which is collapsible, and generally is collapsed when you first open your Book.
Note: Once opened, the Book will automatically save changes to your canvas when those changes are detected.
When you first enter the Book View, the Default Tool is enabled. The Default Tool allows for basic navigation around the Book View: You can use your fingers/stylus to pan the canvas, or use pinch zoom in/out gestures. You can also tap on objects to select them, which will frame them in a selection frame which then allows you to move/resize/rotate them, and to access features through the [Context Menu].
We’ll cover navigation with Bookmarks , the Zoom Menu, the [Context Menu], and the [Object Settings Menu] later on, as well as the Undo/Redo feature for when you do things to objects you didn’t mean to do.
The Drawing Toolbar:

The Drawing Toolbar is likely where you will spend the most of your time, and has the following (from top to bottom):
- The Tool Options Toggle Button:
 Use this button to open and close the options menu for context-aware options of the currently enabled tool. Note: Tools with no real options such as the Default Tool will show no options.
 - The Default Tool:
 The Default Tool is your default navigation tool, allowing you to pan, pinch zoom in/out, and tap to select and manipulate objects on the canvas. Most other tools, when toggled off, will default to this tool mode.
 - Rectangle Selection Tool:
 This tool allows you to draw a rectangle, selecting every object that it intersects with. Clicking the button again will toggle the tool off, enabling Default Tool Mode.
 - Pen Tool:
 The Pen Tool allows you to write or draw freehand. Options available for this tool include line style (solid, dashed, dotted, or dot-dash), line thickness, and line color. Clicking the button again will toggle the tool off, enabling Default Tool Mode.
 - Create Note Tool (updated):
 The Create Note Tool allow you to draw an initial rectangle or tap on a location on the screen, opening a rich text editor that itself allows you to enter text notes, insert images, and draw within the note. You can then move, resize (using the
  ,
,  , and
, and  resize anchors), and rotate these notes how you like using
  . The editor is shown as a floating toolbar, and options for this tool will be covered here. Clicking the button again will toggle the tool off, enabling Default Tool Mode.
 - Eraser Tool:
 The Eraser Tool allows you to use your finger or stylus to erase drawn objects or shapes from the canvas. It’s available option is brush thickness. Clicking the button again will toggle the tool off, enabling Default Tool Mode.
 - Shapes Menu Button:
 This button will open the Shapes Menu, the tools of which will be covered shortly. Once a shape tool from this menu is selected, the menu will be replaced by the Tool Options menu for the selected tool. Clicking the button again will hide the menu and set the Default Tool Mode.
 - Group and Transform Menu Button:
 This button will open the Group and Transform Menu, which will be covered shortly. This menu stays open when using the tools, as they are single transform commands. Clicking the button again will hide the menu and set the Default Tool Mode.
 - Copy:
 Select one or more objects and then tap this button to copy it/them. Clicking the button again will toggle the tool off, enabling Default Tool Mode.
 - Cut:
 Select one or mode objects and then tap this button to “cut” it/them. Clicking the button again will toggle the tool off, enabling Default Tool Mode.
 - Paste:
 Once you have used the Copy or Cut tools, you can paste them by tapping this button, and then tapping on the screen to place them, repeatedly if you like. While editing a note, you can insert text and images copied from outside the app. Clicking the button again will toggle the tool off, enabling Default Tool Mode. Note: Some apps may present difficulties with this- please let us know if you encounter information that doesn’t paste so that we can work on better supporting the data that other apps present for pasting!
 Use this button to open and close the
  The Default Tool is your
  This tool allows you to draw a rectangle, selecting every object that it intersects with. Clicking the button again will toggle the tool off, enabling
  ,
,  , and
, and  resize anchors), and rotate these notes how you like using
  . The
. The  The Eraser Tool allows you to use your finger or stylus to erase drawn objects or shapes from the canvas. It’s available option is brush thickness. Clicking the button again will toggle the tool off, enabling
The Shapes Menu is where you want to go to create shapes. At present, the following shapes are available to be created:
- Straight Line Tool:
 The Line Tool allows you to draw straight lines between any two points. Tap the tool, tap on the starting position, and then drag the line to where you want to end it. The tool options available for this tool are line style, line thickness, and line color. Clicking the Shapes Menu button again will set the Default Tool Mode.
 - Circle Tool:
 The Circle Tool allows you to draw perfect circles. Tap the tool, tap where you want the center of the circle to be, and drag to make the circle larger. The tool options available for this tool are line style, line thickness, line color, and fill color. Clicking the Shapes Menu button again will set the Default Tool Mode.
 - Ellipse Tool:
 The Ellipse Tool allows you to create ellipses/ovals. Tap the tool, tap where you want the corner of the ellipse to be, and then drag to set the length and height of the ellipse. Tool options available for this tool are line style, line thickness, line color, and fill color. Clicking the Shapes Menu button again will set the Default Tool Mode.
 - Rectangle Tool:
 The Rectangle Tool allows you to create rectangles. Tap the tool, tap where you want the corner of the rectangle to be, and then drag to set the length and height of the rectangle. The tool options available to this tool are line style, line thickness, line color, and fill color. Clicking the Shapes Menu button again will set the Default Tool Mode.
 - Regular Polygon Tool:
 The Regular Polygon Tool allows you to create N-sided polygons. Tap the tool, tap where you want the center of the polygon to be, and drag to make the polygon larger or smaller. Tool options available for this tool are line style, line thickness, line color, fill color, and number of sides. Clicking the Shapes Menu button again will set the Default Tool Mode.
 - Star Tool:
 The Star Tool allows you to create N-pointed stars. Tap the tool, tap where you want the center of the star to be, and drag to make the star larger or smaller. Tool options available for this tool are line style, line thickness, line color, fill color, and number of points. Clicking the Shapes Menu button again will set the Default Tool Mode.
 - Freehand Shape Tool:
 The Freehand Shape Tool allows you to create any filled shape you like, akin to the Pen Tool, except as a closed path. Tap the tool, and draw, and it will create a filled shape as you draw. At the end of drawing, it will close the path. Tool options available for this tool are line style, line thickness, line color, and fill color. Clicking the Shapes Menu button again will set the Default Tool Mode.
 The Freehand Shape Tool allows you to create any filled shape you like, akin to the Pen Tool, except as a closed path. Tap the tool, and draw, and it will create a filled shape as you draw. At the end of drawing, it will close the path. Tool options available for this tool are line style, line thickness, line color, and fill color. Clicking the Shapes Menu button again will set the
The Group and Transform Menu allows for several operations to be performed on shapes, notes, and/or groups. Due to the nature of some of the operations, you might find the need to adjust some positioning to your liking. The tools are as follows (top to bottom):
- Group Tool:
 Select one or more objects (drawings, notes, groups), and tap this button, and they will be grouped together, allowing them to be moved, resized, and rotated as one.
 - Ungroup Tool: Select a group, and tap this button, and the child objects of this group will be separated. Note: Sub-groups will still remain groups, as this function is not recursive.
- Horizontal Flip Tool:
 Select an object and tap this button to flip it horizontally.
 - Vertical Flip Tool:
 Select an object and tap this button to flip it vertically.
 - Move To Top Tool:
 Tapping this button will move a selected object to the front of all other objects on the canvas. Useful for ordering objects that overlap.
 - Move Up Tool:
 Tapping this button will move a selected object “up” the hierarchy of objects on the canvas. Useful for ordering objects that overlap.
 - Move Down Tool:
 Tapping this button will move a selected object “down” the hierarchy of objects on the canvas. Useful for ordering objects that overlap.
 - Move To Bottom Tool:
 Tapping this button will move a selected object behind all other objects on the canvas. Useful for ordering objects that overlap.
 Select one or more objects (drawings, notes, groups), and tap this button, and they will be grouped together, allowing them to be moved, resized, and rotated as one.
  Select a group, and tap this button, and the child objects of this group will be separated. Note: Sub-groups will still remain groups, as this function is not recursive.
The Tool Options Menu is a dynamic menu that shows you the available options for the currently enabled tool. The following options are the current options that the menu will show for a given tool that can utilize that setting:
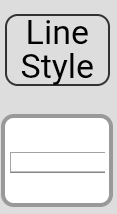
- Line Style (updated):
 This option is available for all shape tools, as well as the Pen Tool. Tap the Line Style button for a drop-down list of line styles consisting of Solid, Dashed, Dotted, and Dot-Dashed line styles. The line shown below will update with all line setting updates on a white background.
 - Line Thickness (updated):
 This option is available for all shape tools, as well as the Pen Tool and Eraser Tool. Drag the slider or type a number to update the width between 1 and 50 px in diameter.
 - Line Color:
 This option is available on all shape tools, as well as the Pen Tool. Tapping the color swatch will show the Color Picker, allowing you to set a color with optional transparency.
 - Fill Color:
 This option is available on all shape tool except the Line Tool. Tapping the color swatch will show the Color Picker, allowing you to set a color with optional transparency.
 - Number of Sides:
 This option is available for the Regular Polygon Tool. Set the number to the desired number of sides for your polygons. Note: Setting this does not presently update an existing polygon’s sides.
 - Number of Points:
 This option is available for the Star Tool. Set the number to the desired number of points for your stars. Note: Setting this does not presently update an existing star’s points.
 This option is available for all shape tools, as well as the Pen Tool. Tap the Line Style button for a drop-down list of line styles consisting of Solid, Dashed, Dotted, and Dot-Dashed line styles. The line shown below will update with all line setting updates on a white background.
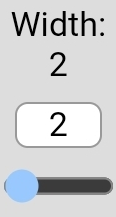 This option is available for all shape tools, as well as the Pen Tool and Eraser Tool. Drag the slider or type a number to update the width between 1 and 50 px in diameter.
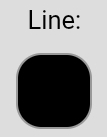 This option is available on all shape tools, as well as the Pen Tool. Tapping the color swatch will show the Color Picker, allowing you to set a color with optional transparency.
 This option is available on all shape tool except the Line Tool. Tapping the color swatch will show the Color Picker, allowing you to set a color with optional transparency.
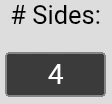 This option is available for the Regular Polygon Tool. Set the number to the desired number of sides for your polygons. Note: Setting this does not presently update an existing polygon’s sides.
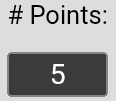 This option is available for the Star Tool. Set the number to the desired number of points for your stars. Note: Setting this does not presently update an existing star’s points.
The Color Picker:

The Color Picker is a dialog that will pop up on the screen whenever you are choosing a color. Clicking on Cancel will leave the current color, while choosing a color and tapping Ok will update the color you’re trying to set. Choose a Hue from the top band, then choose a shade from the center block, and then optionally, set the transparency in the right vertical band. You can also set the color directly with a hex or hexa (rgba in hex form) code in the input above the Cancel button.

(NEW) Alternatively, you can also select from the last 10 selected colors that are shown along the bottom swatches of the dialog, or choose to use the new Color Sampler tool  and moving it until its outer ring contains the color you want to sample.


The Top Menu Bar presents you with features not directly relevant to your drawing and note-taking, but no less useful. Because of this, the Top Menu Bar starts out collapsed (image at top), with the option to expand the menu and access its functionality. The two buttons available in collapsed form are:
- The Library View / Main Menu Button:
 This button will take you directly back to the Library View, allowing you to switch Books, or take other actions as needed.
 - The Menu Toggle Button:
 This button (shown in its form when the menu is expanded) will toggle the Top Menu Bar open and closed.
 This button will take you directly back to the Library View, allowing you to switch Books, or take other actions as needed.
 This button (shown in its form when the menu is expanded) will toggle the Top Menu Bar open and closed.
The features available in the Top Menu Bar when it is expanded are:
- The Bookmarks Menu:
 This button will toggle open/closed the Bookmarks Menu, which will help you navigate quickly around the canvas. This menu is covered here.
 - The Zoom Menu:
 This menu contains the Zoom In Button, Set Zoom Menu, and Zoom Out Button. This menu is covered here.
 - The Undo Button:
 This button will undo common functionality on the canvas and objects such as: Adding/Deleting objects, Edits to color and line settings, and movements of selected objects. Note: Undo/Redo history does not persist when the Book is closed.
 - The Redo Button:
 This button will redo an undone command for common functionality. See Undo for functionality that can be undone. Note: Undo/Redo history does not persist when the Book is closed.
 - The Screenshot Feature:
 This button will take a screenshot of the current screen view of the canvas and save it to the Downloads folder.
 - The Delete Button:
 Select one or more objects on the canvas that you would like to delete, and tap this button to delete them. Undo/Redo works with this feature.
 - The Book Options Menu Button:
 This button will open the Book Options Menu, which is covered here.
 - The Help/About Button: This button will open the Help/About Menu, which is covered here.


The Bookmarks Menu is a hidden gem. Since WayNotes is a spatially-organized note-taking system first, it makes sense to be able to bookmark locations in space. In this way, you can space out and/or cluster your notes in any fashion you like, and then bookmark locations that make sense to you to jump to.
For each Book created, there will be a single default “Origin” location bookmark. This bookmark will take you back to the origin of the Book when you tap on it. This bookmark is not able to be deleted (we don’t want you getting too lost in your work).
To create a new bookmark for a location, use the Default Tool to pan to that location in the canvas. Once the location is viewable to your liking, tap on the Bookmark Menu button to toggle the menu open. Next, tap the New Bookmark  button to create a new bookmark. Once prompted, choose a unique name for the location, and click Ok to create the new location bookmark. It will immediately show up in the bookmarks list.
To travel to the bookmark, tap the name of the location you wish to travel to in the list (scroll to the name if you need to). You will instantly jump to that location- or it will quickly pan to that location if you checked “Animate panning to bookmarks” in the App Settings menu. Now you can avoid panning except when you need to!
Finally, for locations you no longer need to jump to, click on the Delete Bookmark button  next to the location name in the list, and confirm the deletion. The change will automatically appear.
Note: Adding and deleting bookmarks cannot be undone.


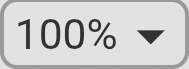
The Zoom Menu consists of three items:
- The Zoom In Button:
 The Zoom In button will zoom into the canvas a set amount (configurable in the App Settings menu). You can also zoom into the canvas using the Default Tool’s pinch zooming capabilities. The Set Zoom Menu will update in realtime.
 - The Set Zoom Menu:
 The Set Zoom Menu (shown in section header) will toggle open/closed when tapped, and allows you to choose a preset zoom amount. The last option, “RESET”, will reset not only the zoom, but also the location of the view (it will send you back to “Origin”).
 - The Zoom Out Button: The Zoom Out button will zoom out of the canvas a set amount (configurable in the App Settings menu). You can also zoom out of the canvas using the Default Tool’s pinch zooming capabilities. The Set Zoom Menu will update in realtime.
 The Set Zoom Menu (shown in section header) will toggle open/closed when tapped, and allows you to choose a preset zoom amount. The last option, “RESET”, will reset not only the zoom, but also the location of
The Book Options Menu controls settings for the individual Book that is currently open. You presently can access this menu by opening the Book, and then tapping the Book Options Menu button in the Top Menu Bar. The settings you’re able to control for the current book are:

- Name: You can change the display name of the current Book Entry for this Book here.
- Description: You can enter a description for your current Book Entry here.

- Book Stripe Color: Set the color for the current Book Entry. To change default settings for all Book Entries, access the App Settings Menu and change it there.
- Book Background Color: Set the color for the current Book Entry’s main color. To change the default settings for all Book Entries, access the App Settings Menu and change it there.
- Book Border Color: Sets the border color for the current Book Entry. To change the default settings for all Book Entries, access the App Settings Menu and change it there.

- Canvas Grid Type Options: You can set the current Book canvas grid type to Plain, Horizontal Lined, Dot Grid, or Square Grid. To change the default settings for all Books, access the App Settings Menu and change it there.
- Grid Color: Tap the swatch and set the color of the chosen grid type (except Plain, which is no grid). To change the default settings for all Books, access the App Settings Menu and change it there.
- Gradient Color: Tap the left side of the swatch to set the bottom color of the current Book’s canvas. Tap the right side of the swatch to set the top color of the current Book’s canvas. To change the defaults settings for all Books, access the App Settings Menu and change it there.
- App Settings:
 At the top-right of the menu is the button for accessing the App Settings Menu, where you can set default settings for many of the options here across all newly created Books.
 At the top-right of the menu is the button for accessing the
 The Note Editor:

The Note Editor is a great way to combine text, images, and drawings into one group that can all be edited as one. To create a note, click the Create Note ![]() button in the Draw Toolbar, and then draw a rectangle on the canvas that is the size which you’d like to start your note with (you can resize it later). Once the rectangle is complete, it will create a note (or, Content Chunk) and open it for editing, like seen above. To exit editing mode, either tap on the canvas outside the note, or tap the Close
button in the Draw Toolbar, and then draw a rectangle on the canvas that is the size which you’d like to start your note with (you can resize it later). Once the rectangle is complete, it will create a note (or, Content Chunk) and open it for editing, like seen above. To exit editing mode, either tap on the canvas outside the note, or tap the Close ![]() button. To re-enter editing mode, simply double-tap the note, and it will open the Note Editor.
button. To re-enter editing mode, simply double-tap the note, and it will open the Note Editor.
When the Content Chunk (note) is selected, you will notice that it does not have the usual scaling buttons like other drawings do. But in edit mode, you will see resize anchors that allow you to resize the note so that you have more (or less) space.
The Note Editor has a number of buttons across the top: Home, Format, Colors, and Options. Click on these to access different feature sets for working with your notes. For all specific Note Editor toolbar functions, see the sections immediately below.
Note: Resizing the note does not delete any text or drawings that are cropped out. That content is merely hidden, and in edit mode, can be viewed by scrolling to it.
Known Issue: On Samsung devices, using the S-Pen directly in the note editor for hand-writing text can deliver some unexpected formatting of inserted text. A workaround at present is to use the Samsung handwriting keyboard feature, which will insert proper newlines.
Drawing in the Note Editor:
This release of WayNotes introduces a far more integrated drawing experience between notes and the canvas.
Drawing in an opened Note Editor is as simple as using the drawing tools that you would use on the canvas in the Book View itself. When you begin drawing inside the Note Editor, then that drawing becomes a child in that editor. Notes themselves can also be transformed. The Undo and Redo tools also work across the canvas and notes.
Note: Scaling is removed in this release. Notes can be resized using resize anchors that allow you to expand editing area. Scaling will make a return in a near-future release when it better coexists with the new Note Editor UI…
Note: Undo/Redo tools work in a linear manner at the moment, so when working with multiple notes, undoing actions will undo actions in the order they were made, not necessarily where you are working…this will change as the Undo/Redo feature continues to be updated…
Note Editor Home Toolbar:

The Home toolbar in the Note Editor contains the following features and functions:
- Bold: Enables bold for typing or selection of text.
- Italic: Enables italic for typing or selection of text.
- Underline: Enables underline text for typing or a selection.
- Strikethrough: Enables a strikethrough (or lined out) text or selection.
- Text-sizing: Choose from Small, Regular, Large, and X-Large for text size.
- Text Color: Choose color for your text.
- Text Background Color: Choose a background color for your text.
- Link/Unlink: Allows you to add a link to selected text, or removes a link if already present.
- Add Image: Allows you to select an image from your gallery to embed into the note.
Note Editor Format Toolbar:

The Format toolbar in the Note Editor contains the following features and functions:
- Numbered (ordered) List.
- Bullet List.
- Task List (checkbox).
- Increase Indent.
- Decrease Indent.
- Align text left.
- Center text.
- Align text right.
Note Editor Colors Toolbar:

The Format toolbar in the Note Editor contains the following features and functions:
- Background type: None (transparent), Color (solid color), Gradient.
- Top: Used for the Color type, or for the Top color of the Gradient.
- Bottom: Used for the Bottom color of the Gradient.
- Angle: Angle of Gradient (defaults to 180- top to bottom).
Note Editor Options Toolbar:

The Format toolbar in the Note Editor contains the following features and functions:
- Padding: Sets the edge padding of the note content (in pixels).
- Export: Exports note as an HTML page to the Downloads folder.

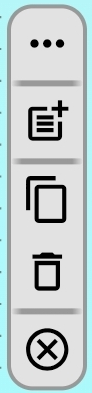
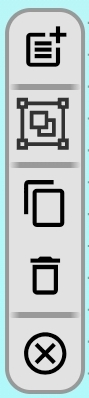
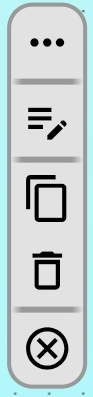
Context Menus for: single shapes, multiple shapes, and notes (content chunks)
Simply put, Context Menus give you quick access to common operations for the object or objects you’ve selected. The features that are presented are dependent on what kind of object(s) you’ve selected, including:
- Single Shapes: Selecting a single shape will allow you to access its Object Settings Menu, create a Note out of it (it will create a Note that is the same size as the object), Copy it, or Delete it.
- Multiple Objects: Selecting multiple objects will allow you to create a Note with all objects contained within it, group the selected objects, Copy them, or Delete them.
- Notes/Content Chunks: Selecting a Note will allow you to access its Object Settings Menu, enter Edit Mode, Copy it, or Delete it.
- All Menus include a Close button, which will both close the Context Menu and deselect the selected object.

The Object Settings Menu hides a few gems for people who will want some power tools for their notes very soon. Here, you will find information on your objects, and be able to edit parameters that you cannot edit elsewhere. You can also name, rename, and add or remove tags to objects (all of which will come in handy when the up-coming search features get implemented).

- Object Name: Name or rename your object. This name does not need to be unique.

- Type: Lists the type of the object, for informational purposes.
- Num. Children: If the object is grouped, this will tell you how many objects are descended from it.

- Position: View or edit the X and Y coordinates of your object, in pixels. Especially useful for accurate placement.
- Rotation: View or edit the rotation of your object in degrees.
- Size: Width and Height of your object, in pixels. This is not the same as scale.
- Line Width: For drawn objects, this displays and edits the line width in pixels.
- Style: For drawn objects, this allows you to edit the line style.
- Line Color: For drawn objects, view or edit the color of its line.
- Fill Color: For drawn objects with fill (Ellipse, Star, Rect, Polygon, Filled Shape, etc), view or edit the color of its fill.

The Tag Editor allows you to view, add, or delete tags on a given object. An unlimited number of tags can be added. However, tags are only viewed and edited for the parent object, meaning that if you select a group, you cannot at this time edit the tags of children.
- Tag Name: Enter the name of the tag you’d like to add, and click the “+” button to add it.
- Individual tags: Click on the delete button on the tags to delete them.
Upcoming Features…
From here, there will likely be a v1.4.9 release for the inevitable bugs and stability updates, and after that, what you can expect from the v1.5 release (subject to change, of course) is this:
- Object alignment and distribution options: These will likely go into the Object Settings Menu as part of access from the Context Menu when selecting multiple objects.
- Ability to directly create single-image notes: The implementation of the new Note Editor pushed this back, but you’ll likely find this as a Context Menu item when creating a note via tapping (ie: tap > note is created and opened to edit with a button to tap to select image)
- Additional grid options: Expect more options, the ability to snap-to-grid, and more.
- UI Customization: This is likely going to take the shape of a change to the UI that merges the Draw Toolbar and Top Menu bar into a cluster that can exist in any of the four corners of the screen and expand out. This allows for both a simpler UI experience across tablet and phone layouts, as well as the ability for you to customize where the menus appear for your own comfort. The Context Menu will become more prominent in functionality as well.
- Gradient fill and stroke: Feature tests went well! But there’s options, and it needs to be fleshed out, and v1.4.8 was dragging on in development time.
- Texture fill and stroke: Subject to experimentation, but would be very cool to have.
- Additional features for bookmarks: Keeping this a bit close to our chest for now, but there’s a few cool things to be done with bookmarks and aiding you in reviewing information.
- Search on tags, names, bookmarks, etc: Search will debut, and will initially be dedicated to looking up items by name, tag, type, or near a bookmark. You’ll be able to pan/jump to those items.
- Jump-links to other bookmarks, notes, and notebooks: Another thing to keep close to our chest, but you can likely guess by reading in general what it entails. This depends on the technical aspects of the app that need to change.
- Technical: Every bit of software needs the gardening equivalent of trimming and replanting every once in a while, and WayNotes is a garden that is growing extremely fast. Optimizing code to run faster and support more features better is a never-ending goal, and v1.5 will bring a number of low-level changes to do just that, from converting from the .waynote files for notebooks to databases, to better display techniques. Onwards, to a better version!
Thank You
Finally, we cannot thank you enough for giving our product a chance, and for sticking with it. This app grew out of a need that we felt was somewhat unaddressed for note-taking, and there’s a billion note-taking apps out there, with far bigger teams, and actual budgets. We entered this market knowing that any new app faces an uphill battle under these conditions, but with time and determination, would gain a secure foothold. And we also know that that doesn’t happen without caring about the users’ experiences and how to best serve them.